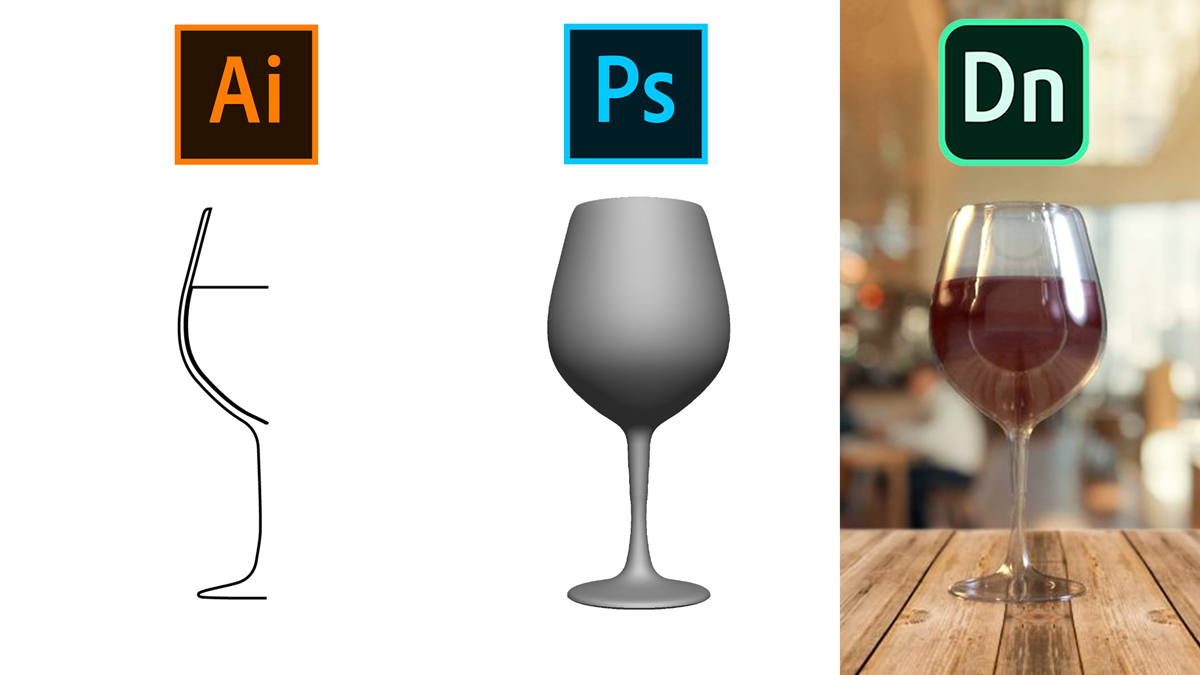
0:00 Use a reference photo & draw the left half of the container in Illustrator
3:40 Paste the vector object into Photoshop
4:00 Go to 3D, New 3D Extrusion from Selected Layer
4:18 Use the preset to revolve around the right-side axis
4:26 Adjust the Extrusion Depth to not quite 0 (make sure there’s no hole)
5:10 Remove hidden backfaces and lines to clean up object
5:20 Export 3D layer as .OBJ
6:08 In Dimension, import your .OBJ
6:24 ‘F’ key will center your imported object into view
6:35 Choose materials and lighting/environment
8:50 Create liquid for the container/glass
11:19 If container has multiple parts, merge 3D layers to keep objects together
14:00 Bonus – tips for lighting and modifications to help glass look more realistic
How to Convert a JPG to a Transparent PNG in Adobe Photoshop
April 10, 2015/ Updated: September 4, 2022


