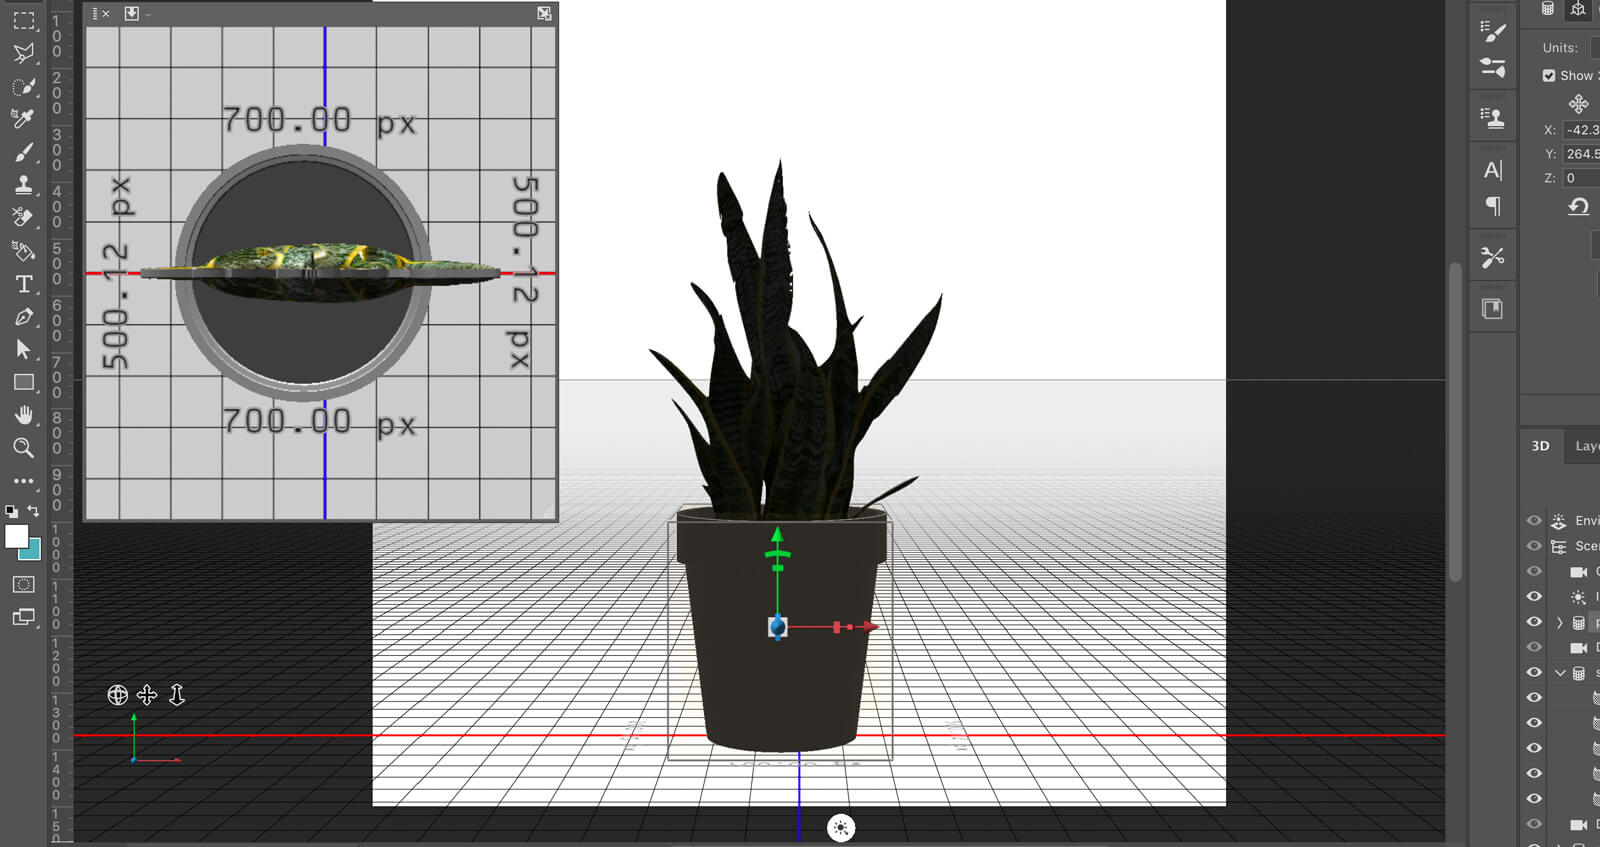
The 3D workspace in Photoshop can be tricky to use. This video demonstrates how to align multiple objects in a scene and merge them together, which allows you to rotate and view the objects together as one object. This video is intended for designers who are unfamiliar with 3D software and may be looking for a tool to mock up scenes and graphic design.
0:00 The 3D Workspace and 3D Secondary View are helpful when working in 3D
0:30 Click on each 3D object layer in the Layers panel and change the 3D camera view to Orthographic
1:10 For each object, go to Coordinates and set the position coordinates to zero and move the objects to the ground. Resize the scale of objects as necessary now that they are in the same position.
4:12 To move all objects together in the scene we must select all objects and go to 3D > Merge 3D Layers (You can still select the objects independently)
5:32 To Export all objects together as a 3D layer as .OBJ by going to 3D, Export 3D Layer, Select .OBJ file type
5:56 In Dimension, import your .OBJ (drag and drop or File, Import)
6:00 ‘F’ key will center your imported object into view
6:15 You can apply materials and decals to each object independently; the properties panel will allow you to customize specific dimensions (proportionately with the lock) or each axis independently
Adobe Dimension is a simpler interface to use and consistent with its series of Illustrator and Photoshop programs versus having to learn a new 3D interface and shortcuts. If you already know how to use a 3D program, then please skip this video. You’ll get a much better quality rendering from a 3D program if you’re savvy with those tools. This is not intended to show a polished work of art.


